My DAW of choice is Ableton Live. If you’re not familiar with Live, it’s a digital audio workstation powerhouse developed by Ableton for all your music-making needs: composing, recording, DJing, arranging, mixing, mastering.
The latest version of Ableton Live was released on February 23, 2021. If you’re already a producer, vocalist, musician, or engineer, Live 11 is enough cause for excitement whether or not Live is your mainstay or a tool you’ve been considering incorporating into your arsenal. If you’re beginning to explore your relationship with audio, I encourage you to head to the official Ableton website after this article to learn in greater depth what Live has to offer you.
Live 10 was released just over three years ago. This version included a built-in Wavetable synthesizer, the Capure MIDI feature to retrieve unrecorded material, and automation and modulation shapes that strengthened the staple features like Simpler, Sampler, Operator, and Max for Live to name a few.
As an Ableton Certified Trainer and devoted Live user, I had been patiently waiting for the official release of Live 11 to share a new feature that I had been wishing for and knew would radically change my workflow: multi-track comping.
The comping I am referring to here is not the “complementing” found in jazz where pianists, guitarists, or drummers support a soloist with chords, rhythms, or countermelodies. Comping in the context of Live 11 is part of a long tradition in music-making. As recording technology has become more advanced and capable, the desire to create “the perfect take” resulted in the process of compiling or “comping” takes together as a part of the editing workflow. This began with engineers and producers slicing pieces of tape music and stitching different parts together into a patchwork yet flawless final version of a vocal cut or synth take.
I enjoy integrating hardware (my Push 2, Telecaster, modular synthesizer) with Live because there are times when I feel blocked “writing” music with a keyboard and mouse and I want to use my hands or body more expressively. Comping makes playing that much more enjoyable because you can stay in the flow during the recording process and don’t have to compromise during the editing process.
Previously, I “hacked” Live for comping in two ways:
Loop a clip for a pre-determined length and re-record over it until I achieved the perfect take.
Record multiple takes of the same section in one long clip, divide the section into the appropriate length after auditioning, paste into a new audio track, and then drag in different sections of clips to a “master” clip with fades for seamless flow.
This will still work in Live 10, 9, etc! It’s not the worst, but not the most elegant or efficient either.
Well, how does comping work in Live 11? Here’s how Ableton officially describes it: “Live organizes multiple passes of an audio or MIDI performance into individual takes” and you can “[l]ink two or more audio or MIDI tracks to edit or comp their content simultaneously.”
So, every time you record or re-record a take in an armed audio or MIDI track, Live automatically creates a new “take lane” for it. Then you’re able to highlight different segments from each take to form a composite main track.
But let’s go through it step-by-step…
Record in audio or MIDI (hint: set and enable a loop range before recording)
Explore takes by right-clicking a track and selecting Show Take Lanes
Audition takes by pressing T on your keyboard
Create take lanes manually by right-clicking on a lane and selecting Insert Take Lane
Create a composite from different takes:
Select a segment from a take lane and press enter
Use draw mode and drag through segments to select
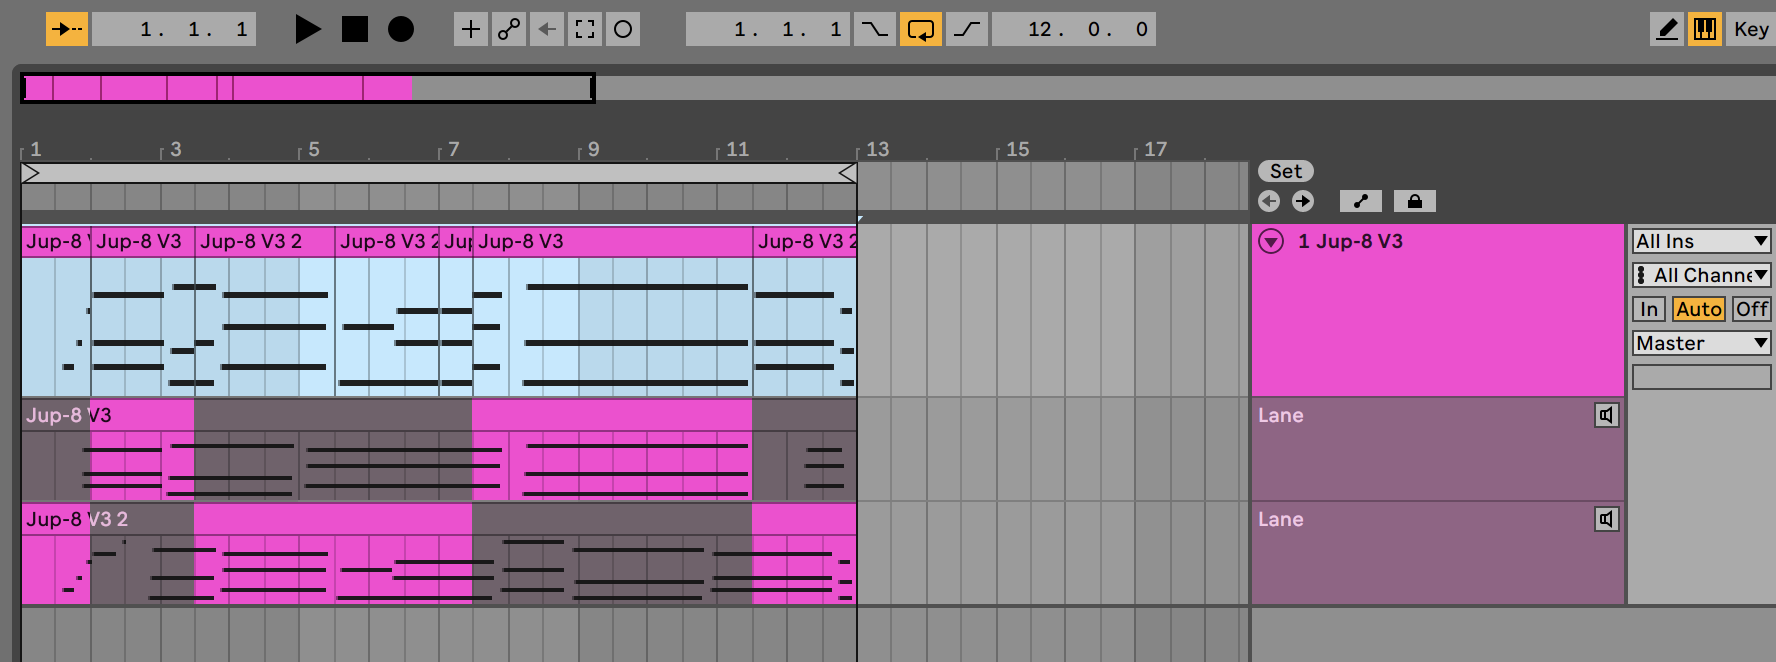
(See image above for a composite MIDI track created from two takes using Arturia’s Jupiter-8 V3.)The highlighted portions of each take lane are reflected in the “main” take. Notice that the two takes do not have the same MIDI notes.
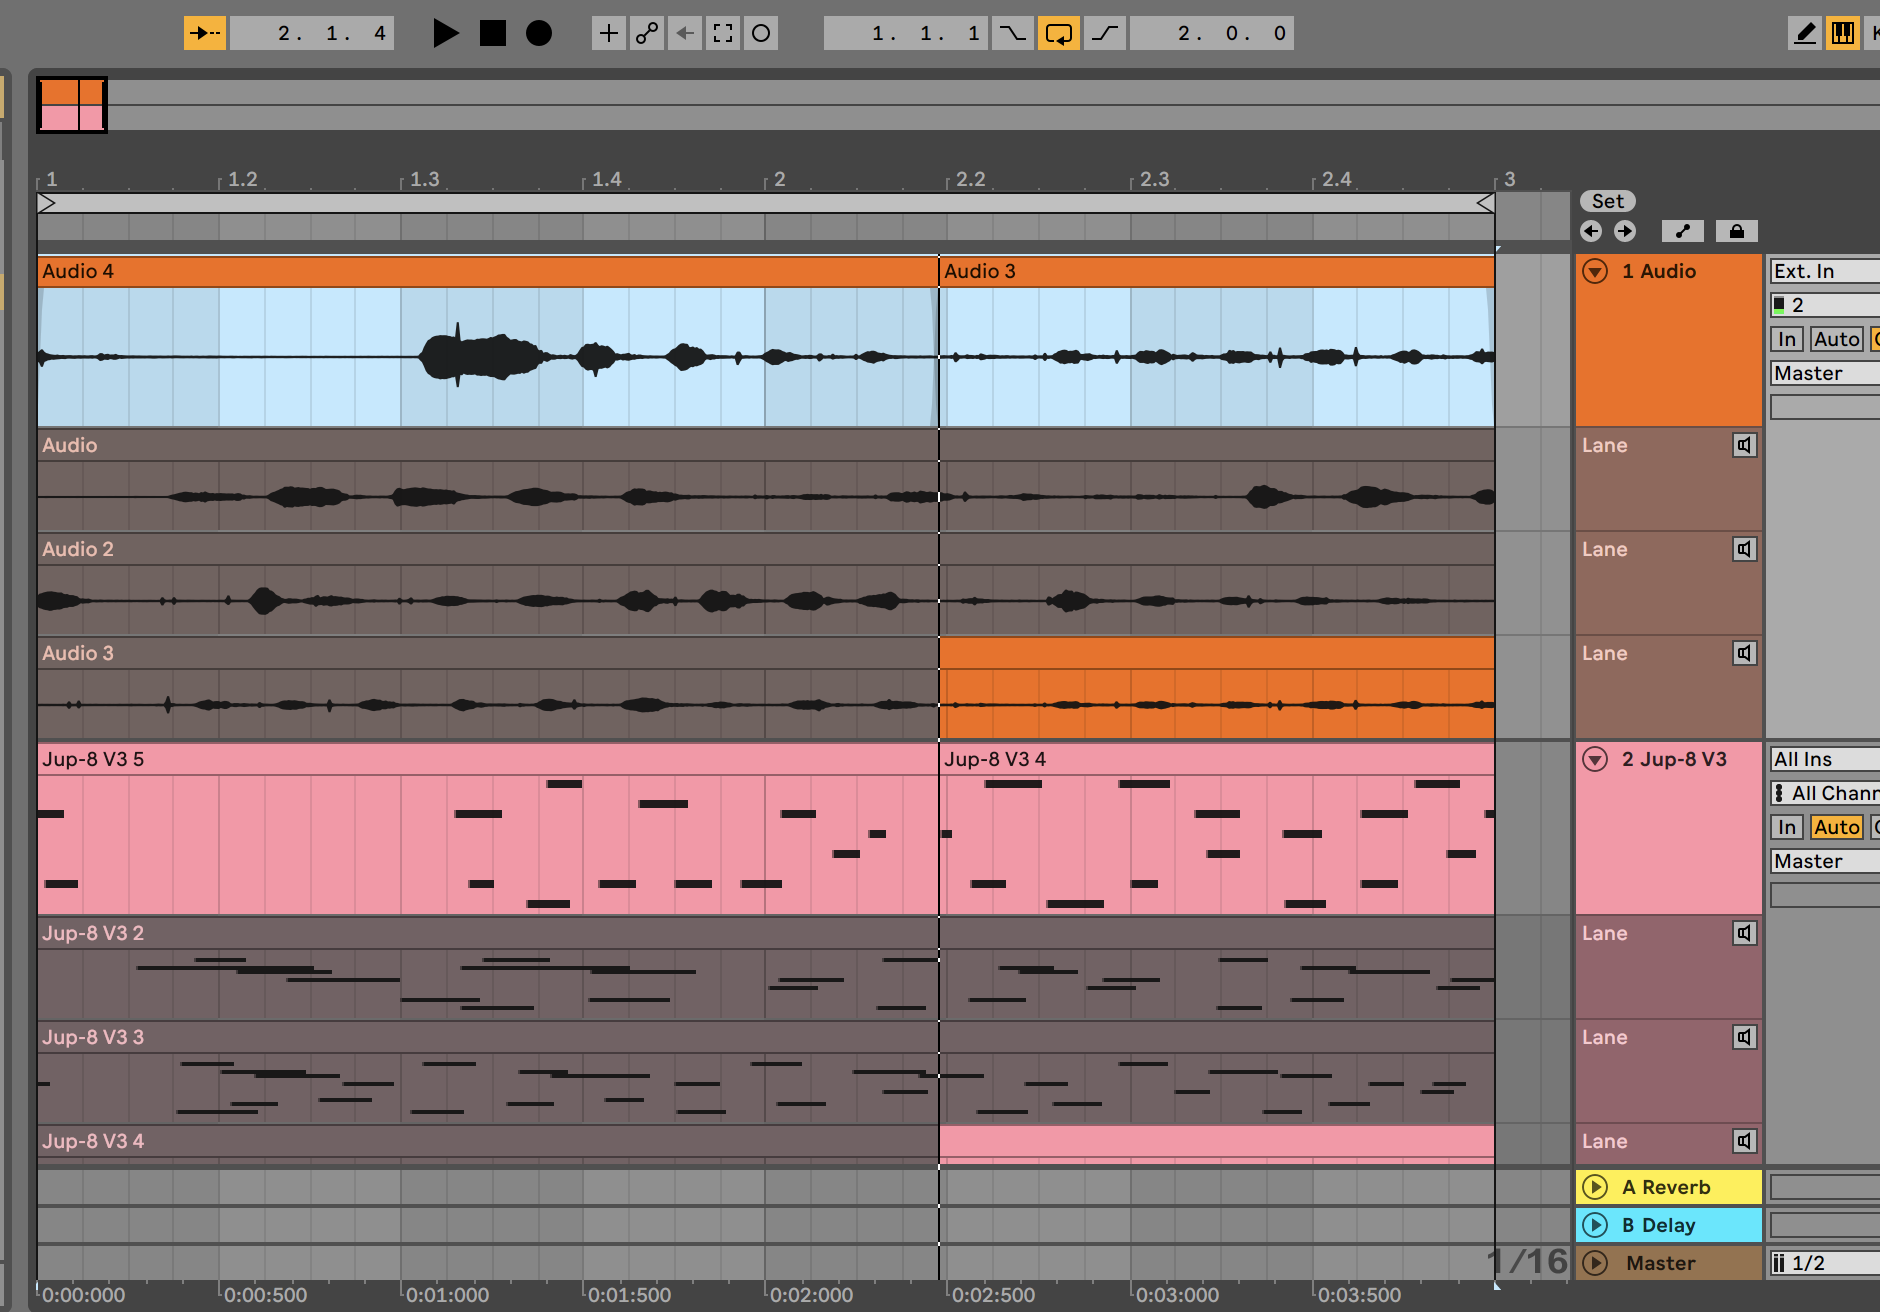
Don’t forget that comping is possible while recording multiple tracks (audio and MIDI together) so you can jam away by yourself or with an entire band without needing to stop until you get it just right. (See the image to the right.)
Perhaps my favorite aspect of comping in Live 11 is being able to drag in different audio clips and samples into new track lanes to create a truly non-linear arrangement for creative sound design applications. (See image below.)
Factor comping in with the new linked track capability for even more efficiency. To link tracks for editing, shift select tracks (audio or MIDI), right-click, and select Link Tracks from the context menu. If tracks are already in a group, just right-click the group track and select Link Tracks.
Once tracks are linked, you can make edits that apply to all of them. This is especially useful for grouped drum, vocal, or synth takes. You’ll know you’ve done it right when you see a small link icon to the right of the track name. (See image to the right.)
What next?
If you’ve never tried comping before and you’re new to LIve, explore what it feels like to keep playing even after you’ve made a mistake and to introduce variation into your recordings as you play. Comping in Live 11 is an incredibly powerful feature that elevates the bedroom producer or jam band’s recording process to seamless and professional.
If you’ve tried comping in another DAW but don’t use Live, check out this video guide Ableton produced for additional insight into the workflow.


